WHAT WE DO


TESTINGS CONDUCTED
CHEMICAL ANALYSIS BY SPECTROPHOTOMETER
Our Lab is equipped with two Optical Emission Spectrometers (OES), capable of high precision results in analysing various alloys like
⦁ Ferrous alloys
⦁ Aluminium alloys
⦁ Copper alloys
⦁ Mg alloys
⦁ Ni alloys
Chemical analysis of metals by the traditional wet method has several inherent drawbacks, involving a waiting period which can extend upto a long time, as it requires separate testing for each element, and has considerable scope for human errors. Besides being cost effective the quick and sophisticated solution for error free analysis is Optical Emission Spectrometry. Our fully computerized and automated process ensures quick and accurate results.
Spark OES technique operates on a robust and reliable technology and is the most widely used technique in the analysis of almost all the known elements with very high precision and accuracy. The two primary reasons behind the unparalleled efficiency of Spark OES are minimal sample preparation time (no sample dissolution is required) and extremely high sample-analysis throughput. With outstanding repeatability, reproducibility, and reliability, OES Spectrometers are the most preferred equipment for chemical analysis.
MECHANICAL TESTING

a. Tensile Testing
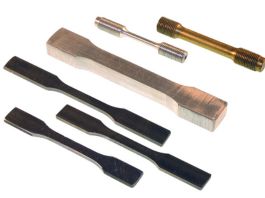
Mechanical properties are an important measure of product quality and tensile testing is just one way to certify the product. Tensile tests are simple, relatively inexpensive and fully standardized. Universal Testing Machine serves for ascertaining the strength and deformation of all kinds of materials such as steel and other materials in the form of rods, sheets, wires, tubes, chains and so on. Welded joints of metals can also be tested.
Other tests using UTM:
⦁ Testing of shouldered and threaded specimen
⦁ Testing of flat belts
⦁ Transverse Rupture test
⦁ Bending tests
⦁ Flattening Test
⦁ Compression Test
⦁ Break Load & Proof Load of Bolts
b. Impact Testing
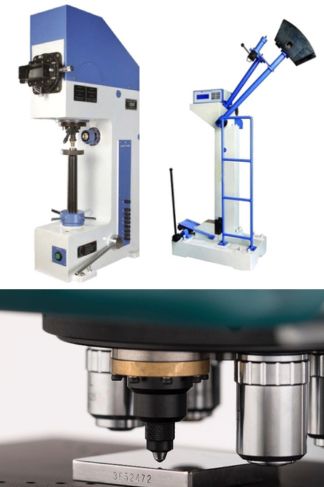
Universal Pendulum Impact Testing Machine serves for calculating Charpy and Izod Impact. The Impact test, is a standardized high strain-rate test which determines the amount of energy absorbed by a material during fracture. This absorbed energy is a measure of a given material’s toughness and acts as a tool to study temperature-dependent transition.
It is widely applied in industry since it is easy to prepare and conduct and results can be obtained quickly. Also, the strain rate may be studied and analyzed for its effect on fracture. Impact testing enables to determine the behavior of metal under impact loading conditions giving the proof of susceptibility of brittle fracture and enables to supervise the heat treatment process. The proof of brittle fracture enables inferences to be drawn on cold/hot brittleness, ageing and other prejudices of material.
c. Rockwell / Brinell / Vickers Hardness Testing
Hardness measures the resistance of a sample to permanent deformation due to a constant compression load from a sharp object. Common indentation hardness scales are Rockwell, Vickers, Shore, and Brinell. Hardness testing of ferrous and non-ferrous metals are conducted as per HRA / HRB / HRC / BHN/ HV/ SHORE A & D.
METALLURGICAL TESTING
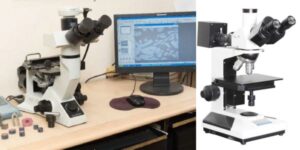
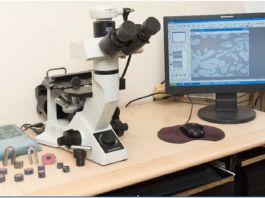
Metallography is the study of the microscopic structure of metals and alloys using optical metallographs, electron microscopes or other surface analysis equipment. We are equipped with state of the art Metallurgical / Industrial microscope ideally suited to the needs of manufacturing research and development industry. Metallography or microstructural analysis includes, but is not limited to, the following types of analysis:
⦁ Grain size
⦁ Grain Flow
⦁ Microstructure
⦁ Intergranular Corrosion (IGC)
⦁ Coating thickness
⦁ Inclusion size, shape and distribution rating
⦁ Macro etch test
⦁ Case Depth
⦁ Weld Penetration
⦁ Decarbonization
CORROSION RESISTANCE TESTING

The salt spray test is a standardized test method used to check corrosion resistance of coated samples. Coatings provide corrosion resistance to metallic parts made of steel, zamak or brass.
Salt spray test is an accelerated corrosion test that produces a corrosive attack to the coated samples in order to predict its suitability in use as a protective finish. Salt spray testing is popular
because it is cheap, quick, well standardized and reasonably repeatable.
NON DESTRUCTIVE TESTING like UT, DPT and MPT
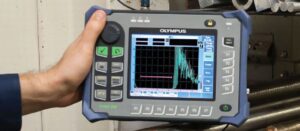
⦁ Ultrasonic Inspection
Ultrasonic nondestructive testing, also known as ultrasonic NDT or simply UT, is a method of characterizing the thickness or internal structure of a test piece through the use of high frequency sound waves. The frequencies, or pitch, used for ultrasonic testing are many times higher than the limit of human hearing, most commonly in the range from 500 KHz to 20 MHz. In industrial applications, ultrasonic testing is widely used on metals, plastics, composites, and ceramics.
Advantages of Ultrasonic Inspection include:
Ultrasonic testing is completely nondestructive. The test piece does not have to be cut, sectioned, or exposed to damaging chemicals.
⦁ It is a volumetric testing method means it is able to detect both surface and subsurface discontinuities.
⦁ Flaw detection or measurement is superior to other NDT methods.
⦁ Equipment used for testing is portable and easy to operate in different locations.
⦁ Highly accurate in determining discontinuity position and estimating size and shape.
⦁ Minimal part preparation is required.
⦁ It can also be used for the thickness measurement of the specimen.
⦁ Magnetic Particle Inspection
Magnetic Particle Inspection (MPI) is a Non-Destructive testing method that can detect surface and subsurface flaws such as cracking, pores, cold lap, lack of sidewall fusion in welds etc in ferromagnetic materials. Magnetic Particle Inspection is often carried out to help determine an item’s fitness for us or conformity.
Advantages of Magnetic Particle Inspection
⦁ Can find both surface and near sub-surface defects
⦁ Some inspection formats are extremely portable and low cost
⦁ Rapid inspection with immediate results
⦁ Indications are visible to the inspector directly on the specimen surface
⦁ Can detect defects that have been smeared over
⦁ Can inspect parts with irregular shapes (external splines, crankshafts, connecting rods, etc.)
⦁ Dye Penetrant Inspection
Dye Penetrant Inspection (DPI), also called Liquid Penetrant Inspection (LPI) or Penetrant Testing (PT), is one of the oldest and simplest NDT methods where its earliest versions (using kerosene and oil mixture) dates back to the 19th century.
Liquid penetrant inspection is used to detect any surface-connected discontinuities such as cracks from fatigue, quenching, and grinding, as well as fractures, porosity, incomplete fusion, and flaws in joints.
Advantages of DPI
⦁ High sensitivity (small discontinuities can be detected).
⦁ Few material limitations (metallic and nonmetallic, magnetic and nonmagnetic, and conductive and nonconductive materials may be inspected).
⦁ Rapid inspection of large areas and volumes.
⦁ Suitable for parts with complex shapes.
⦁ Indications are produced directly on the surface of the part and constitute a visual representation of the flaw.
⦁ Portable (materials are available in aerosol spray cans)
⦁ Low cost (materials and associated equipment are relatively inexpensive)


WE LOVE TO HEAR FROM YOU
We are just a phone call away.
